Wildlife Encounter Protocols: De-escalation and Defense for Bears, Mountain Lions, and Moose
Core Principles of Wildlife Encounter Protocols
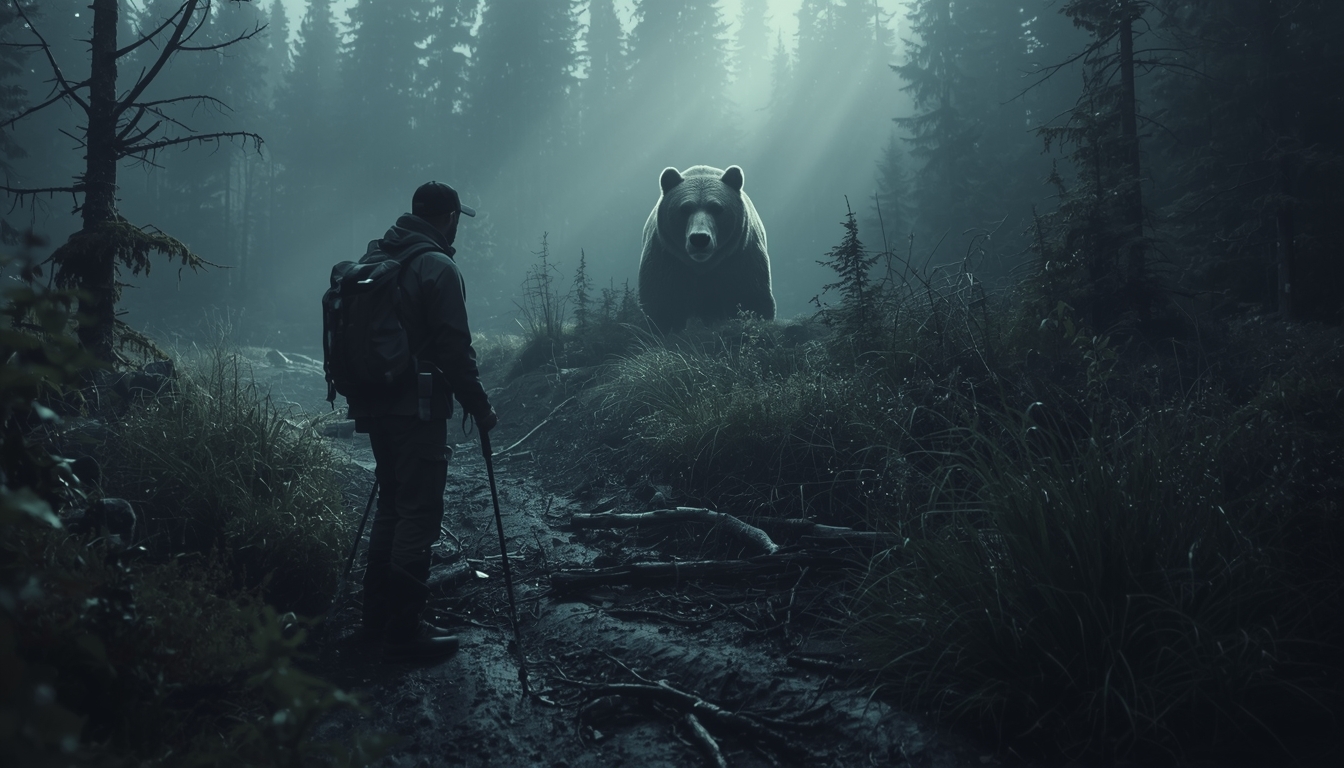
Safety starts before “fight or flight” kicks in
When people talk about wildlife defense, they often jump straight to tools-spray, firearms, noise makers. A better approach is a protocol: a repeatable sequence you can run under stress.
Related Articles:
In most encounters, your goal is to buy time and create distance without triggering the animal’s threat response. That means your actions should look calm and predictable, even if your heart is pounding.
A useful mindset is: you’re negotiating space. You do that by controlling your body language, your speed, and your angle of retreat.
You also keep your options open-meaning you don’t run, you don’t corner the animal, and you don’t “prove a point” by standing too close for a photo.
For baseline guidance that aligns with many park policies, the National Park Service keeps practical bear safety recommendations here: NPS bear safety guidance. Read it now, not later at the trailhead.
De-escalation first, defense second
De-escalation works because most animals don’t want a high-risk fight. Bears want space or food, mountain lions want a clean opportunity, and moose want you out of their bubble.
Your job is to communicate one clear message: “I see you, I’m not prey, and I’m leaving.”
Defense is what you do when de-escalation fails-because distance closes too fast, you’re surprised at close range, or the animal commits to contact. A common mistake is treating every encounter like an attack.
If you escalate early (yelling, charging, throwing objects), you can turn a tense moment into a real incident.
Think in layers:
- Layer 1: Awareness + distance (avoid getting close)
- Layer 2: Calm posture + communication (make yourself understood)
- Layer 3: Barriers + tools (spray, terrain, trees, rocks)
- Layer 4: Last-ditch physical defense (only if contact is imminent)
Know what you’re dealing with: a quick comparison
Different animals “escalate” for different reasons, and your response should match that reality. Use this at-a-glance table as your quick mental reference.
| Animal | Most common driver of conflict | Typical “danger zone” | Your best early move | Biggest mistake |
|---|---|---|---|---|
| Bear (black/grizzly) | Surprise, food defense, cub defense | Close range on trail, carcass/berries | Talk calmly, back away, give route | Running or crowding for photos |
| Mountain lion | Predatory assessment, especially in low-visibility | Quiet trails, dawn/dusk, near cover | Face it, look big, don’t crouch | Turning your back or bending down |
| Moose | Personal space, calves, rut, winter stress | Trails near willows, deep snow, dogs | Leave immediately at an angle | Standing your ground too long |
This comparison helps you choose the right default posture in the moment. Next, let’s reduce the odds you’ll need those moves at all.
Pre-Encounter Planning: Reducing Your Odds
Build your “encounter buffer” with smart habits
Most ugly encounters begin with one of two problems: you got too close, or the animal didn’t know you were there. Your planning should aim to prevent both.
On trail, that means you create an “announcement pattern.” Talk with your group, especially near running water, dense brush, or blind corners.
If you hike solo, use periodic, normal-volume speech rather than random screaming. Weird, sudden noises can sound like distress and may pull attention your way.
You also need to manage temptation. Food smells, trash, and even scented toiletries can attract bears into human areas.
If you’re camping, follow local storage rules and use bear-resistant canisters where required.
For food storage fundamentals and why it matters, the U.S. Forest Service has clear direction on reducing human-bear conflicts: USFS bear-smart practices.
Carry the right tools-and know how you’ll access them
Tools don’t help if they’re buried in your pack or you’ve never practiced with them. Your goal is fast access + trained reflexes.
Bear spray is widely recommended in bear country because it’s effective at close range and doesn’t require pinpoint accuracy under stress.
The detail many people miss is carry position. It should be on your belt or shoulder strap, not inside your backpack.
Also think about “interface problems” that slow you down:
- Gloves and cold hands
- Hip belts covering your holster
- Trekking pole straps trapping your wrists
- Rain shells snagging on clips
Practice unclipping and presenting your spray with the same clothing you’ll wear on the hike.
💡 Pro Tip: Do a 10-second drill before you leave the parking area: locate spray, unclip it, aim at an imaginary target, and re-holster. If it takes longer than 2-3 seconds, adjust your setup.
A pre-trip checklist that prevents panic decisions
A simple checklist reduces the odds you’ll make a frantic choice (like sprinting) when you’re surprised.
Before You Go Checklist:
- [ ] Check recent wildlife alerts for the area (trailhead boards, ranger posts)
- [ ] Pack food in odor-resistant bags and commit to “pack it out” trash
- [ ] Carry bear spray where you can reach it with either hand
- [ ] Hike with a realistic visibility plan (headlamp if dusk is possible)
- [ ] Decide in advance how your group will respond (who talks, who watches behind)
- [ ] Keep dogs leashed where moose or bears are common (many incidents start with a dog)
If you do nothing else, do the last two. Group confusion is a huge escalation factor.
With your plan dialed in, the next skill is recognizing when an animal is shifting from neutral to agitated.
Reading Animal Behavior: Early Warning Signals
Distance, direction, and “attention” tell you what’s next
When you spot an animal, ask three questions immediately:
- How far?
- Which way is it moving?
- Is it paying attention to me?
Those three cues predict the next 10 seconds.
If the animal is far and moving away, your protocol is simple: stop, watch, and let it leave.
If it’s close or moving toward you, shift into de-escalation mode.
Attention is the big one. A bear standing to sniff, a lion staring, or a moose locking on with ears forward means you’re now in the conversation.
Your job is to end that conversation by increasing distance without acting like prey.
Common agitation cues you should treat as a warning, not a dare
Animals communicate clearly; humans ignore it because they’re excited, filming, or trying to stay calm. Learn the “back off now” signals and treat them as your cue to leave.
Common cues by species:
- Bears: jaw popping, huffing, swaying, ears pinned back, bluff-charging
- Moose: raised hackles, ears back, head tossing, lip licking, stomping
- Mountain lions: crouching, tail twitching, fixed stare (predatory focus)
Your response is not to yell “go away” and walk closer. Your response is to create a clean retreat route while facing the animal and keeping your movements smooth.
⚠️ Warning: “It didn’t run away” is not curiosity you should test. It can mean the animal is protecting something (food, cubs, calves) or evaluating you.
Real-world scenarios that cause surprise encounters
Surprise is the match that lights most incidents. Here are common setups so you can recognize them in your own trips.
- Scenario 1: Blind corner on a brushy trail. You round a bend and see a bear at 30 feet. You freeze, speak calmly (“Hey bear”), and slowly step back the way you came.
- Scenario 2: Quiet snowy trail in winter. A moose is standing on the packed path because it’s easier than deep snow. You give it the trail-step off if you safely can, or turn around and take another route.
- Scenario 3: Lion country at dusk. You notice you’ve stopped hearing birds and you feel “watched.” That’s a cue to regroup, face outward, and leave the area without jogging.
These examples lead straight into the moment that matters most: what you do when you realize distance is already too close.
De-escalation Framework: What to Do in the First 10 Seconds
The 10-second reset: stop, breathe, widen your options
Your first move should be boring: stop moving forward.
Take one breath, plant your feet, and orient your body so you’re not squared up like you’re challenging the animal.
Then scan quickly:
- Where is your retreat path?
- Is there a barrier (tree, boulder, terrain rise) you can use?
- Where are your partners and kids?
If you’re with others, pull them in close so nobody looks like a separate target.
This “reset” prevents the most common panic behavior-running-while giving you a moment to choose a direction that doesn’t trap you or the animal.
📝 Quick Summary: Stop advancing, control your breathing, keep everyone together, and identify a retreat route before you do anything dramatic.
Communicate like a human, not like prey
Once you’ve stopped, use a calm, firm voice. Short phrases work: “Hey bear,” “Whoa moose,” “Go on.”
The goal isn’t to insult the animal. It’s to announce that you’re a human and you see it.
For bears and moose, avoid high-pitched screams that can resemble distress noises.
For mountain lions, a stronger, assertive tone is useful while you maintain eye contact.
Your body language matters just as much. Stand tall, keep your hands visible, and avoid crouching (which can resemble prey posture).
If you need to reach for spray, do it smoothly and deliberately rather than frantically patting your pockets.
For additional guidance on large carnivore encounters, including mountain lions, many state wildlife agencies compile best practices-Colorado Parks & Wildlife is a solid reference: CPW mountain lion safety.
Back away with intention: angle, pace, and “don’t trigger chase” rules
Now you create distance.
Back away at an angle rather than straight backward if terrain allows. It helps you keep footing and avoids trapping yourself.
Move slowly enough that the animal doesn’t feel pursued, but steadily enough that you’re clearly leaving.
Keep your eyes on the animal (especially for mountain lions), but don’t stare aggressively at bears at close range-think aware, not challenging.
If the animal follows, stop again. Reassert your presence with your voice, then increase your barrier use (step behind a tree, put a boulder between you).
The big “don’t” list is short but critical:
- Don’t run.
- Don’t turn your back on a lion.
- Don’t move closer to get a better picture.
- Don’t let kids or dogs scatter.
Once you’ve bought a little space, your next decision is species-specific-starting with bears.
Bear Encounters: Assessing Risk and Responding to Escalation
Black bear vs. grizzly: what changes in your decision-making
If you’re in bear country, you don’t need to be a wildlife biologist. But you do need a quick mental fork:
“Am I likely dealing with a black bear or a grizzly/brown bear, and does this feel defensive or predatory?”
That fork influences whether you keep focusing on disengagement or prepare for a different worst-case.
In general, black bears are more often involved in food-conditioned encounters around camps, trailheads, and trash.
They can still be dangerous, but they’re also more likely to leave when you’re calm, firm, and you give them an exit.
Grizzlies are more likely to react strongly to surprise at close range, carcasses, or a sow with cubs.
Here’s a practical field read you can use without obsessing over details: if the bear is focused on you, closing distance, and not breaking off even as you back away, treat that as higher risk regardless of species.
Your job is to keep de-escalation running while quietly moving into defense-ready positioning (spray accessible, barrier options identified, group tight).
Bluff charges, defensive behavior, and when “holding your ground” is smart
A bluff charge is scary because it looks like an attack until it isn’t.
You might see a rapid rush, dirt kicking, huffing, jaw popping, or a sudden stop/veer-away. The point is usually “move away,” not “I’m trying to eat you.”
Your best response is to stay upright, avoid screaming, and keep your spray ready.
If you run, you can flip the script into a chase. If you charge back, you can force contact.
Instead, plant your feet, speak in a steady voice, and prepare to deploy spray if the bear crosses into your effective range.
📝 Quick Summary: With bears, you’re trying to avoid two errors: (1) running and triggering pursuit, or (2) freezing so long that the bear closes the gap and you lose options.
If contact actually happens, guidance differs by situation and species. That’s why your earlier “defensive vs. predatory” assessment matters.
From bears, the next big shift is to predators that behave differently-mountain lions.
Mountain Lion Encounters: Interrupting the Predator “Problem-Solving”
Signs you’re being evaluated (and how to move without acting like prey)
Mountain lions don’t typically want a fair fight. They want surprise, isolation, and an easy “yes.”
That means your protocol is about making yourself a hard no.
The clue set can be subtle. You may notice a lion that doesn’t immediately run, movement parallel to the trail, or a fixed stare from the edge of cover.
Sometimes you won’t see the cat at all. Your first clue may be behavior in your group (kids drifting behind, your dog fixating, or that uncomfortable feeling that you’re being tracked).
If you suspect you’re being followed, tighten your formation. Put kids in the middle, bring your dog close (preferably leashed), and stop letting anyone lag behind to “take one last photo.”
Then leave the area deliberately-no jogging, no crouching to tie shoes, no bending down to pick up a dropped item while facing away.
A simple rule: if you have to do something that lowers you (like grabbing a water bottle), do it while keeping your chest oriented toward where you last saw the lion.
Make yourself bigger, set boundaries, and use objects effectively
Once a mountain lion is engaged-staring, crouched, or not retreating-your body language becomes a tool.
Face the animal, square up more than you would with a bear, and raise your arms or open your jacket to look larger.
If you have trekking poles, hold them wide like “antlers” and keep them between you and the cat.
You’re also allowed to be louder and more assertive here than with a bear. A firm shout, clapping, and throwing rocks near (not blindly into brush where you can’t see) can help break the cat’s focus.
Your goal is to force the lion to reassess: “This isn’t prey; this is trouble.”
Boundary-setting checklist (mountain lions):
- [ ] Face the lion and maintain eye contact
- [ ] Stand tall; don’t crouch or bend at the waist
- [ ] Gather children close; pick small kids up if you can do so safely
- [ ] Use poles/pack/jacket to look bigger
- [ ] Back away slowly toward open terrain or a more populated area
If the lion commits to an attack, the priority is different than with many bear scenarios. You generally fight back aggressively with whatever you have.
Now let’s move to an animal that isn’t hunting you-but can still injure you badly: moose.
Moose Encounters: Managing Space When the Animal Won’t Yield
The moose problem: they’re not hunting you, they’re evicting you
Moose incidents often happen because people treat moose like slow, clumsy deer. In reality, a moose can sprint faster than you, pivot quickly, and stomp hard enough to cause catastrophic injuries.
Most charges are about one thing: you’re too close for what the moose considers acceptable.
The “why now?” triggers matter:
- Cows with calves can be highly defensive
- Bulls during the rut can be unpredictable
- Winter moose may be extra reactive because deep snow and low energy make them less willing to move
Dogs are a major complication. A moose may view a dog like a wolf, and a panicked dog can drag the conflict right back to you.
So your protocol is simple: don’t negotiate. If you see ears pinned back, raised hackles, head tossing, or stomping, you leave immediately and give the moose a clean lane.
⚠️ Warning: A moose standing on the trail is not “blocking you.” It’s telling you to choose a different plan.
Retreat routes, hard barriers, and what to do during a charge
With moose, distance is your friend-but hard cover is your best friend.
Trees, large boulders, and even dense stands of timber can break a line-of-charge.
If you have to back away, do it at an angle and aim for a barrier you can put between you and the animal.
A common mistake is retreating into an open area with no obstacles. In open ground, a moose can close the distance fast, and your only option becomes “run,” which usually fails.
Instead, think like this: Where can I place a tree trunk between me and the moose in the next 5-10 seconds?
If a moose charges, you’re not trying to “stand your ground.” You’re trying to get behind something solid.
If you’re knocked down, protect your head and neck, curl into a ball, and stop moving until the moose disengages. Getting up too quickly can re-trigger stomping.
Once you’ve created space, the next layer is tools-especially spray-and the mechanics matter.
Bear Spray and Defensive Tools: Getting the Mechanics Right
A “ready” posture that doesn’t escalate the situation
When you transition from de-escalation to defense-ready, you’re doing two things at once:
1) continuing to communicate calmly, and 2) preparing for fast tool deployment.
The trick is to avoid frantic movements that can spike the animal’s arousal.
For bear spray, your best posture is usually spray in hand, safety still on, can oriented upright, elbow slightly bent, and your non-spray hand free for balance.
If you’re with a partner, avoid both people drawing at once in a tight cluster. Give each other space so nobody gets clipped by an accidental discharge.
A practical example: you’re backing away from a bear that keeps following. You stop behind a tree, bring spray to chest level, and speak in a steady voice.
You’re not “aiming” like it’s a movie. You’re staging for a quick, controlled presentation.
💡 Pro Tip: If you use trekking poles, practice dropping one pole cleanly without tangling your wrist strap. Poles are great-until they trap your hands when you need your spray.
Range, wind, and the “sweep” that actually stops forward motion
Most spray failures come from one of three issues: waiting too long, firing too early, or spraying into a stiff wind.
You want the animal to enter your effective cloud-not to paint the forest.
When the animal is closing and you’re running out of space, you’re aiming to create a horizontal barrier between you and the animal.
Point slightly downward so the cloud hangs at face level as it expands. Use a short burst to test wind drift before committing to a longer spray.
A simple sweep pattern works well:
- Start in the centerline
- Sweep left-right across the animal’s path
- Keep the cloud between you and it (don’t try to “track” its head)
Quick “spray decision” cues:
- If the animal is closing fast and you can’t safely keep backing up, stage your spray.
- If it enters your effective range and continues forward, deploy a barrier cloud.
- If the wind is blowing spray back at you, angle off-line and use terrain to reduce blowback.
Tools are only half the equation. The other half is knowing what to do if contact happens.
Contact Scenarios: Last-Resort Decisions for Bears, Lions, and Moose
If a bear makes contact: choosing the right response without guessing
If you’ve done everything right and a bear still makes contact, your response depends on what kind of event it has become.
That’s why earlier you assessed “defensive vs. predatory” behavior.
A defensive encounter (common with surprise or cub/carcass defense) often looks like a rapid escalation with lots of noise and short distance.
In that case, your last-resort goal is frequently to stop the interaction as quickly as possible.
If you go to the ground, protect your belly and neck. Keep your pack on if possible, and minimize movement so you’re not re-triggering the bear.
A predatory-type situation tends to involve focused attention, following, and testing your boundaries.
If you believe it’s predatory, your priority shifts toward active resistance-using spray, rocks, sticks, and body positioning to stop forward engagement.
⚠️ Warning: Don’t let pride decide for you. Your job is to *survive*, not to “prove” you’re brave. Use the response that matches the behavior you observed.
If a mountain lion attacks: what “fight back” really means on a trail
If a lion commits to contact, passive strategies aren’t your friend. You’re trying to convince a predator that you’re too costly to continue.
“Fight back” doesn’t mean wild swinging while you fall down a slope.
It means staying as upright as possible, protecting your neck and head, and using hard, targeted strikes with whatever you have:
- Trekking poles
- A rock
- A water bottle
- A sturdy flashlight
Aim for sensitive targets (face, eyes, nose). Keep driving the animal off rather than trying to “win” a wrestling match.
If you’re with others, coordinate instead of scattering. One person keeps eyes on the cat while the other pulls kids behind and hands over tools.
The most dangerous thing you can do is turn it into a chase game by sprinting or separating.
A realistic scenario: you’re on a quiet trail and the lion lunges. You plant your feet, thrust with your poles, and yell while your partner keeps the group tight.
You’re creating chaos and resistance-the opposite of prey.
Surviving contact is huge, but what you do after an encounter also matters-for your health and for everyone else on the trail.
After the Encounter: Medical Actions, Reporting, and Your Next-Step Plan
Immediate first aid priorities (even if you “feel fine”)
After any high-stress encounter, your body can hide injuries. Adrenaline is great for escaping-and terrible for accurate self-assessment.
As soon as you’re in a safe spot, do a fast head-to-toe check.
Look for bleeding you didn’t notice, especially on hands and forearms (common if you used poles or pushed through brush). Also check for sprains if you backed away on uneven terrain.
If spray was deployed, manage contamination:
- Don’t rub your eyes
- Rinse with cool water if available
- Remove contaminated clothing if symptoms are escalating
If there was contact-bite, claw, stomp, trampling-treat it as a medical emergency. Control bleeding with direct pressure, keep the injured person warm, and start your evacuation plan early rather than “seeing how it goes.”
Reporting, debriefing, and turning one scare into better habits
Reporting isn’t about getting an animal “in trouble.” It helps land managers warn others, close trails if needed, and address human-caused attractants.
When you report, be specific:
- Location (GPS if you have it)
- Time
- Species
- Behavior (following, bluff charge, stomp)
- Whether spray was used
- Whether food was involved
If you’re in a park or managed area, contact rangers when possible. Otherwise, use local wildlife agency channels.
Then do a quick personal debrief while the details are fresh:
- What was the first cue you noticed?
- What slowed you down (pack straps, poles, group confusion)?
- Did you have a clean retreat route?
- What will you change next trip?
📝 Quick Summary: The encounter isn’t “over” when the animal leaves. Your post-incident actions-medical check, reporting, and honest debrief-are what reduce your odds of a repeat.
Your practical next steps: run one short protocol rehearsal before every hike (stop → breathe → retreat angle), practice accessing spray with your actual clothing, and agree on one simple group rule: nobody lags behind.
If you do those three things consistently, you’ll handle most real-world encounters with far more control-and far less panic.