Building a Temporary Shelter: Step-by-Step Survival Guide

Selecting the Right Location
Importance of Location
Choosing the right location for your temporary shelter is crucial for both safety and comfort. Look for a spot that’s dry, flat, and elevated if possible, to avoid water accumulation during rain. Avoid areas under lone trees or tall cliffs due to the risk of lightning strikes and falling rocks. A well-chosen location can protect you from harsh weather conditions and potential hazards, making your survival experience significantly safer.
Related Articles:
Avoiding Common Mistakes
Many beginners choose a location too close to water sources, attracted by the convenience. However, this exposes them to flooding, cold temperatures due to humidity, and potentially dangerous wildlife. Always maintain a safe distance from water bodies and focus on finding a location that provides natural shelter from the wind and predators.
Expert Advice
Experts suggest looking for natural features that can complement your shelter, such as:
- A rock wall to block the wind
- Dense foliage for insulation
They also recommend checking for signs of animal trails or nests to avoid unwelcome encounters. Remember, your shelter’s location doesn’t just impact your immediate comfort but your overall chances of survival.
Gathering Materials
Identifying Useful Natural Resources
Your environment is full of natural resources that can be utilized to build a sturdy shelter. Look for:
- Long, sturdy branches
- Leaves, moss, and vines
These materials can be used for the structure’s framework, insulation, and binding elements. Understanding which resources are available and how to use them can significantly ease the construction process.
Using Man-made Materials
If you have access to man-made materials, such as tarps, ropes, or even plastic sheets, they can greatly enhance your shelter’s durability and waterproofing. A combination of natural and man-made materials provides the best of both worlds, offering a strong structure with excellent protection against the elements.
Common Pitfalls
A common pitfall is underestimating the amount of material needed. Always gather more than you think is necessary, as this allows for mistakes or adjustments during construction. Also, ensure that the materials are sturdy and flexible enough to withstand the weather conditions of your chosen location.
Constructing the Basic Structure
Laying the Foundation
The foundation of your shelter is pivotal for its stability and durability. Begin by creating a strong base using larger branches or rocks. This base should be solid enough to support the weight of the shelter without shifting.
Erecting the Frame
Once the foundation is set, construct the frame of your shelter using the longest, strongest branches you can find. The frame’s design will depend on the type of shelter you’re building (e.g., lean-to, A-frame). Ensure that the frame is securely anchored to the ground and any supporting features like trees or boulders.
Securing the Shelter
After the frame is up, it’s time to add the walls and roof. Weave smaller branches, leaves, and other materials through the frame to create a dense barrier against the elements. If using man-made materials, secure them tightly to the frame to prevent wind from tearing them away. Properly securing your shelter is essential for warmth and protection from the weather.
Enhancing Shelter Stability
Choosing the Right Support
When it comes to enhancing the stability of your temporary shelter, choosing the right support is paramount. Look for sturdy trees or large boulders that can serve as a solid anchor for your structure. For a lean-to shelter, finding two trees spaced appropriately apart can provide the perfect framework. The key here is to ensure that whatever you use as support can withstand adverse weather conditions, thus keeping your shelter intact and you safe inside.
Reinforcement Techniques
To further reinforce your shelter, consider using intertwining techniques for branches and vines, creating a lattice that adds strength and durability. Utilize knots that tighten under tension, such as:
- The taut-line hitch
- The bowline
for securing tarps or other materials. Remember, the goal is to create a structure that not only offers protection but can also stand up to the elements. Adding layers of branches, leaves, or even snow, depending on your environment, can provide additional insulation and stability.
Regular Maintenance
Maintaining your shelter is as important as building it. Regular checks for potential weak spots, especially after weather disturbances, can prevent sudden collapses. Look out for loosening knots, sagging materials, or branches that might have shifted. Early detection and repair of these issues can make a significant difference in the longevity and safety of your shelter.
Insulating Your Shelter
Natural Insulation Materials
Insulation is crucial for keeping warm and dry inside your shelter. Nature provides a plethora of materials that can be used for this purpose, such as:
- Leaves, moss, and grasses
- Pine boughs, with their dense needles
Layer these materials thickly around and inside your shelter for maximum effect.
Improvising with Man-made Materials
If you have man-made materials like tarps, blankets, or even bubble wrap, use them to your advantage. A tarp can be used as a windbreak or an additional layer of waterproofing, while blankets can provide warmth. Bubble wrap, though less common in a survival situation, can be an effective insulator due to the air pockets within it. Layering these materials with natural ones can create an even more effective barrier against the elements.
Sealing Drafts
Sealing any drafts is key to maintaining the internal temperature of your shelter. Pay special attention to the shelter’s entrance, as it is typically the largest gap. Using a makeshift door made of branches, a tarp, or additional foliage can significantly reduce heat loss. For smaller gaps in the walls or roof, stuffing moss or small bundles of grass can effectively block cold air from entering.
Optimizing Shelter Location
Leveraging Natural Features
Upon selecting a general location for your shelter, further refine your choice by identifying natural features that can enhance your shelter’s effectiveness. For instance, a rock formation can serve not only as a partial windbreak but also as a heat sink, absorbing the sun’s rays during the day and radiating warmth at night. Similarly, positioning your shelter near a dense thicket can provide additional camouflage and protection from the wind.
Avoiding Hazardous Areas
While leveraging natural features, be mindful of potentially hazardous areas. Steer clear of dead trees or unstable boulders that could collapse onto your shelter. Also, avoid valleys or areas that look like water channels, as these could become flooded during rainstorms. The key is to balance the benefits of natural features with the safety considerations they entail.
Adjusting for Climate and Season
Your shelter’s location and construction should also be influenced by the prevailing climate and season. In colder climates, positioning your shelter to maximize exposure to the morning sun can make a significant difference in temperature. Conversely, in warmer climates, finding a shaded area might be more beneficial to avoid overheating. Additionally, consider the direction of prevailing winds and try to orient your shelter’s entrance away from them to minimize exposure.
Advanced Shelter Enhancements and Modifications
Adapting to Extreme Weather
Extreme weather conditions require additional shelter modifications to ensure your safety and comfort. In areas prone to heavy snowfall, for instance, reinforcing the roof of your shelter to prevent collapse is critical. This can be achieved by creating a more steeply pitched roof, which allows snow to slide off more easily. Similarly, in hot and arid climates, maximizing ventilation through strategic openings can help reduce the interior temperature of your shelter. These modifications not only make your shelter more resilient but also more adaptable to varying environmental conditions.
Water Collection and Management
An often overlooked aspect of shelter building is incorporating features for water collection and management. By positioning a tarp or other non-porous material to catch and funnel rainwater into a container, you can secure a vital water source directly at your shelter site. Additionally, ensuring that the area around your shelter is properly graded can prevent water accumulation and potential flooding during heavy rainfall.
Pest and Predator Deterrents
Incorporating natural or man-made deterrents to keep pests and predators at bay is another advanced shelter modification. The use of smoke from a small fire can repel insects, while strategically placed thorny branches or noise-making devices can discourage larger predators. The goal is to make your shelter a safe haven from not just the elements, but also from wildlife that might pose a threat.
Expert Tips for Long-Term Shelter Living
Sustainability Practices
For those who might find themselves relying on a temporary shelter for an extended period, implementing sustainability practices is key. This involves not only efficient resource use, such as minimizing waste and recycling materials for shelter enhancements, but also integrating small-scale food production if feasible. Establishing a perimeter for foraging and planting edible plants can provide a renewable food source near your shelter.
Psychological Well-being
Long-term survival situations can take a toll on one’s psychological health. Personalizing your shelter to make it feel more like a home, such as by adding simple decorations or designated areas for different activities (sleeping, cooking, etc.), can significantly boost morale. Regular routines and small comforts can make a substantial difference in maintaining a positive outlook during prolonged periods of survival.
Regular Upgrades and Repairs
Over time, your shelter will inevitably require repairs and upgrades. Setting aside time for regular maintenance checks and being proactive about making necessary adjustments will ensure that your shelter remains safe and functional. This includes reinforcing structural elements, patching leaks, and adapting the shelter’s design to meet changing needs or environmental conditions.
Final Thoughts and Actionable Steps
Reflecting on Shelter Building as a Survival Skill
Building and maintaining a temporary shelter is a fundamental survival skill that requires practice, patience, and adaptability. Whether you’re a seasoned outdoor enthusiast or someone preparing for potential emergency situations, the ability to create a safe, durable shelter can be life-saving.
Continuous Learning and Practice
The best way to hone your shelter-building skills is through continuous learning and practice. Take every opportunity to experiment with different techniques and materials, and don’t be afraid to make mistakes-each one is a learning experience. Additionally, staying informed about new survival strategies and advancements in outdoor gear can provide valuable insights for enhancing your shelter-building capabilities.
Preparing for the Unexpected
Finally, always be prepared for the unexpected. Keep a compact survival kit with essential tools and materials that can aid in shelter construction. Familiarize yourself with the fundamentals of survival, including water procurement, signaling for help, and basic first aid. By being well-prepared and knowledgeable, you’ll significantly increase your chances of thriving in any survival situation.
In conclusion, building a temporary shelter is more than just a means to an end; it’s a critical skill that embodies resourcefulness, resilience, and ingenuity. By applying the advanced techniques and expert tips outlined in this guide, you’ll be well-equipped to construct a shelter that not only withstands the elements but also provides comfort and security in the wilderness. Remember, the key to mastering this skill is practice, adaptation, and a willingness to learn from every experience. Stay safe, and happy building!
Compare Products
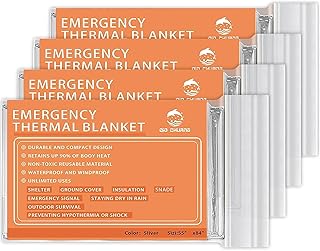
Understanding the importance of selecting the right location for your temporary shelter highlights the need for gear that complements this decision. The FREE SOLDIER Waterproof Portable Tarp and the Emergency Mylar Thermal Blankets are two pivotal options that cater to the outdoor adventurer’s need for comfort and safety. The former offers a multifunctional solution for those seeking a durable, weather-resistant shelter, while the latter provides essential warmth and protection in emergency situations.
By comparing the FREE SOLDIER Tarp with the Emergency Mylar Thermal Blankets, you can better determine which product aligns with your outdoor living needs. Whether you prioritize ease of setup and versatility for various weather conditions or the lightweight, life-saving warmth of a space blanket, your choice should reflect the kind of experiences you
| Feature / Product | FREE SOLDIER | Emergency Mylar |
|---|---|---|
 |
 |
|
| $95.02 | Check Price | |
| Shop now → | Shop now → | |
| Specifications | ||
| Brand | FREE SOLDIER | N/A |
| Weight | 1 kg | N/A |
| Dimensions | 320.04 x 299.72 x 0.25 cm; 1 kg | N/A |
| Material | Polyester | N/A |
| Capacity | N/A | N/A |
| Efficiency | N/A | N/A |
| Waterproof | Yes | N/A |