Primitive Trapping Systems for Survival: Deadfalls, Snares, and Placement Strategy (With Safety and Ethical Guidelines)
When Traps Become a Survival Liability (And How to Prevent It)
The real problem: wasted energy and false confidence
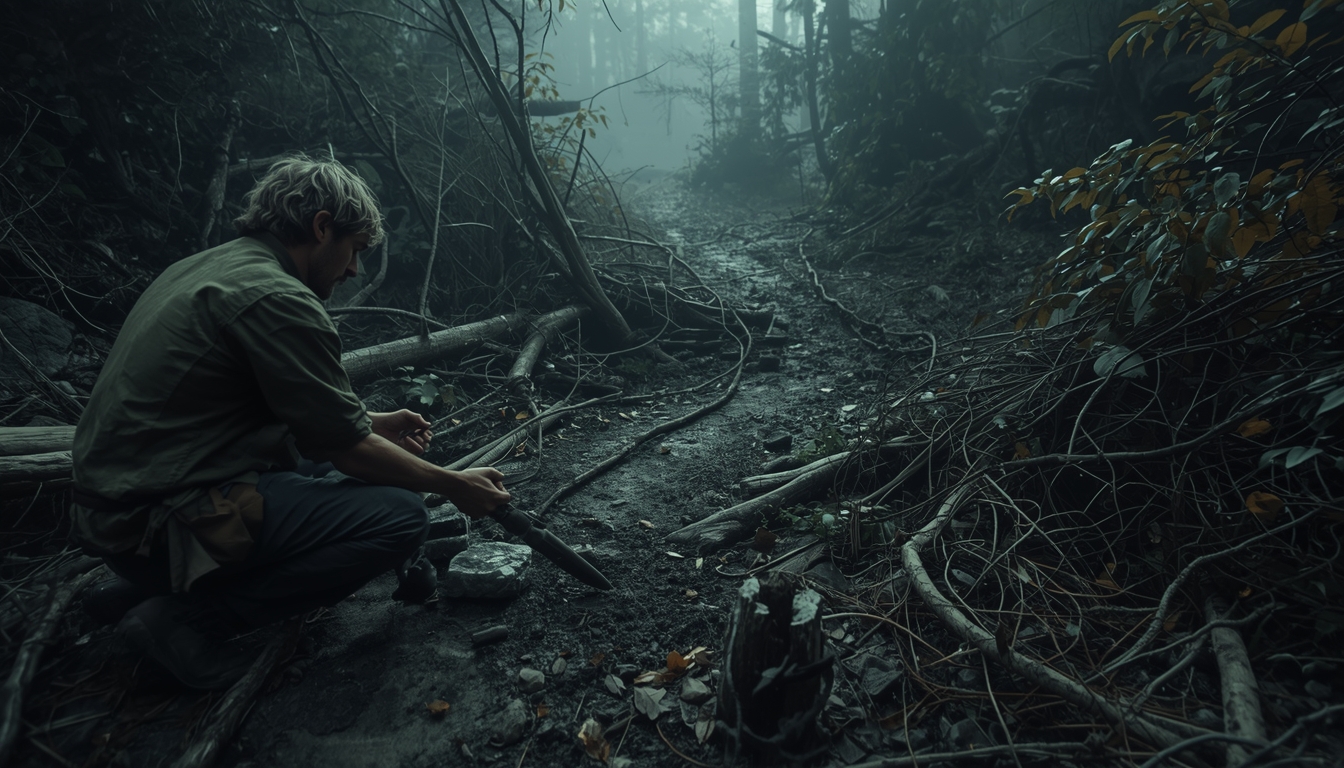
Primitive trapping is often taught like a shortcut to food. In practice, it can become a time sink that drains calories faster than it provides them. If you build complicated sets in poor locations, you’ll spend hours carving triggers and hauling materials for zero return.
Related Articles:
The fix is to treat trapping like a system, not a gadget. You need the right target, the right location, and a build that matches your tools and cordage. When any one of those is missing, traps fail quietly while your situation gets worse.
The safety problem: traps don’t know what you meant to catch
A deadfall doesn’t care if a mouse, a rabbit, a dog, or a child triggers it. A snare will hold whatever fits, including non-target wildlife. That means your “survival skill” can turn into a serious hazard if you set traps near trails, camps, or areas used by other people.
Your first layer of protection is placement discipline. Your second layer is design discipline:
- Avoid overly powerful sets near human activity
- Avoid locations where non-target animals are likely
- Keep traps away from predictable footpaths (yours and others’)
If you’re traveling with others, establish clear rules about where traps can and cannot be placed. It only takes one misunderstanding to cause an injury.
The ethical problem: unnecessary suffering and illegal take
Many jurisdictions regulate or prohibit snares, certain trigger types, and trapping during specific seasons. Even in a genuine emergency, you should avoid practices that cause prolonged suffering. In non-emergency training, follow the law and use legal methods only.
Use authoritative references to check rules and protected species in your area. Start with the U.S. Fish & Wildlife Service state agency directory. If you’re on public land, also review National Park Service hunting and trapping guidance.
When in doubt, don’t set traps.
Quick rule: If you can’t check a trap line reliably, don’t set it. Unchecked traps are unsafe, unethical, and often illegal.
Now that you’ve got the “why” (and the risks) clear, the next step is making sure you’re trapping the right thing in the right place.
Knowing What You’re Trying to Catch (Before You Build Anything)
Match the method to realistic, ethical targets
The biggest beginner mistake is building a “rabbit snare” without confirming rabbits exist where you are. In many environments, you’ll see more evidence of squirrels, mice, rats, or birds than rabbits. Traps should match what’s present and what you can legally and ethically take.
In a true survival emergency, small game is usually the most realistic target because it’s abundant and requires less gear to process. In training scenarios, focus on learning sign, placement, and safe construction without trying to take animals.
A useful mindset is to ask yourself: What animal is already behaving predictably here? That question leads to better sets than guessing.
Read sign like a map: tracks, scat, browse, and rubs
Animals advertise their routines. Tracks show direction and frequency. Scat can hint at diet and how recently the area was used.
Look for patterns, not one-off signs. A single track in mud might mean “passing through.” A worn run with repeated prints means “this is a route.”
For rabbits and hares, focus on tight trails through grass, under brush, and along the edges of thickets. For squirrels, watch for feeding sign under nut trees and along logs that connect canopy routes. If you can’t find concentrated sign, you’re usually better off relocating than trying to “make it work” in a dead zone.
Think like the animal: cover, edges, and predictable funnels
Most small game prefers cover. They move along edges where brush meets open ground. They also hug natural barriers like logs, rock lines, and creek banks.
Those barriers create funnels where a trap has a higher chance of being encountered. Instead of placing a set “near” sign, place it where movement is constrained.
A practical way to test a location is to sit still for ten minutes and watch. If you see movement, hear consistent rustling, or notice repeated paths, you’ve found a better use of your time than random sets.
With targets and movement patterns in mind, your next bottleneck is usually gear-specifically cordage and build materials.
Cordage and Materials: The Weak Link That Causes Most Failures
Natural cordage vs. modern line (and what matters most)
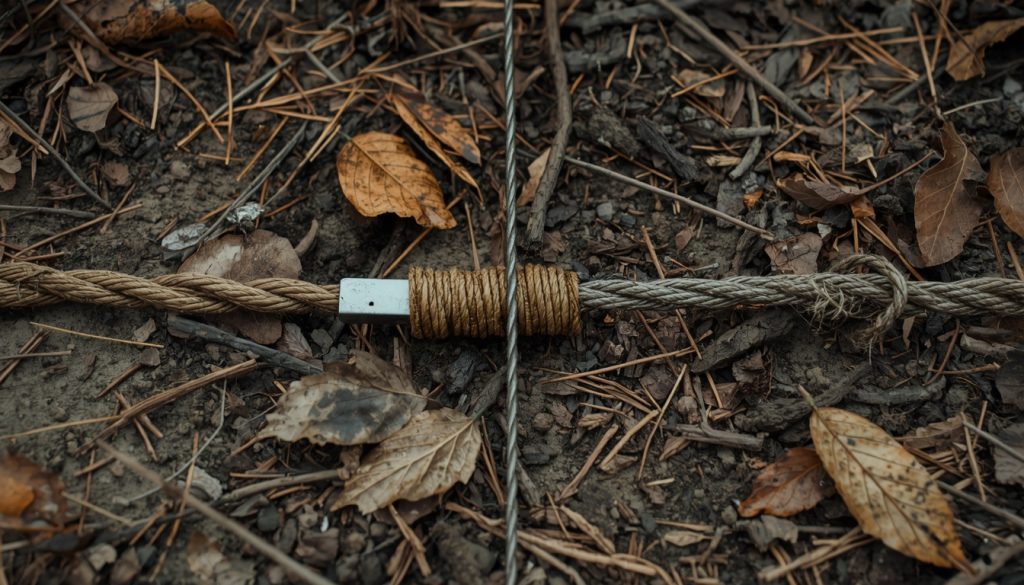
Snares and triggers live or die by cordage quality. Natural fibers can work, but they often stretch, absorb water, and degrade quickly. Modern line (bank line, paracord inner strands, picture wire, or snare wire) is more consistent and easier to tune.
In a survival situation, “what you have” often decides the choice. Still, it helps to know what matters most:
- Tensile strength (won’t snap)
- Abrasion resistance (won’t saw through on bark/stone)
- Knot security (won’t slip under load)
If your cordage slips or frays, you’ll get pull-outs and empty sets. That’s lost time you may not be able to afford.
Selecting trigger sticks and notches that won’t crumble
Deadfalls rely on carved interfaces, and soft or punky wood ruins precision. Choose green hardwood when possible. If all you have is softwood, increase contact surface and avoid hair-thin notches.
A good trigger stick should resist crushing. If your notch compresses under load, the trap can either misfire early or never fire at all.
Before you commit to a final set, do a quick stress test:
- Flex the stick (does it crack or splinter?)
- Press the notch surfaces together (do they deform?)
- Test under tension (does it creep or slip?)
At-a-glance material comparison
Below is a quick way to choose cordage and components based on conditions.
| Material | Best Use | Pros | Cons | Practical Tip |
|---|---|---|---|---|
| Snare wire (brass/steel) | Snares | Strong, low stretch, holds shape | Kinks, can injure non-targets if misused | Pre-form loops and avoid sharp bends |
| Tarred bank line | Snares, lashing | Knot-friendly, abrasion resistant | Still stretches under heavy load | Use proven knots and snug them hard |
| Paracord inner strands | Small snares, triggers | Available, decent strength | Slippery knots, UV wear | Use backup knots and melt ends |
| Natural fiber (bark, grass, sinew) | Emergency-only | Locally available | Weak when wet, variable strength | Overbuild, keep dry, replace often |
Once you trust your materials, you can focus on the two workhorse systems: deadfalls and snares.
Deadfalls That Actually Work: Designs, Build Steps, and Stability
Figure-4 deadfall: simple, sensitive, and easy to misbuild
The figure-4 is popular because it uses three sticks and no cordage. It’s also easy to carve poorly. If your notches are uneven or your bait stick is too short, the set becomes either hair-trigger unsafe or too stiff to fire.
Basic build approach: choose a flat rock or heavy log as the weight, then build the trigger under it with a stable base. Carve slowly and test frequently with a light touch. You want the weight to be supported, not balanced like a trick.
Practical example: if you’re targeting mice or rats around a cabin or debris field, scale everything down. Small deadfalls with modest weight are safer and often more effective than oversized sets.
Paiute deadfall: cordage adds control and consistency
The Paiute deadfall uses a vertical stick, a lever stick, and a toggle with cordage. The benefit is adjustability. You can tune sensitivity by changing cord length and notch depth rather than re-carving everything.
Why it matters: in wet or freezing conditions, wood swells and friction changes. A cordage-assisted trigger is easier to re-tune quickly. If you’re running multiple sets, that consistency saves time.
If you have reliable line, this design is often more repeatable than a pure stick trigger. It also lets you place bait in a more controlled position.
Stabilizing the weight so it falls cleanly
A deadfall that “rolls” or wedges is a deadfall that misses. Your goal is a clean drop that pins the animal. Use small shims (pebbles, twigs) only where they won’t interfere with the fall path.
Build on firm ground. Clear leaf litter and level the base so the weight doesn’t shift. Then test-fire with a stick from a safe distance to confirm the weight lands where you expect.
Safety checkpoint: Always test-fire deadfalls from the side with a long stick. Never put your hand under a set weight while “just adjusting one notch.”
Deadfalls can be effective, but snares often give you faster set times once you understand loop control and anchoring.
Snares for Survival: Loop Size, Anchoring, and “Guiding” Without Overdoing It
The core challenge: a snare is only as good as its anchor
Snares fail most often because animals pull out or the anchor shifts. Your anchor should match the target’s strength. For very small game, a sturdy stake can work. For larger small game, anchor to a living sapling or a buried deadman anchor.
In soft soil, stakes loosen. In rocky soil, stakes won’t drive. Plan for this.
If you can’t anchor confidently, choose a deadfall or a different location rather than hoping the ground holds. Hope is not a strategy.
Loop sizing and height: reduce misses and non-target catches
Loop size and height depend on the animal and the trail. As a general practice, you want the loop positioned where the animal’s head naturally passes. Too high and you miss. Too low and you catch legs, increasing escape risk and injury.
Instead of guessing, read the trail like a blueprint:
- Tight rabbit run with a low “roof” of brush: easier to control loop position
- Open path with multiple bypass options: higher chance of misses and non-target contact
Tight runs allow better control with minimal guiding. Open areas usually require you to find a better pinch point.
Subtle guiding: natural funnels beat aggressive fencing
People often overbuild “funnels” with lots of sticks, which can spook animals and advertise human activity. Use the environment first. Place the snare at a pinch point created by brush, a log, or a rock.
If you must guide, do it lightly. A couple of small twigs angled to discourage bypassing is usually enough.
Your goal is to encourage the existing path, not build a new one. If your set looks “engineered,” it probably is-and animals notice.
With the trap body in place, performance comes down to one thing: the release behaving the same way every time.
Trigger and Release Mechanics: Sensitivity Without Constant Misfires
The problem with “too sensitive”: wind, vibration, and false fires
A trap that fires in wind is a trap you’ll waste time resetting. This is common with poorly balanced figure-4 triggers and with deadfalls set on uneven ground. It also happens when bait is placed so birds can peck it.
Fix this by controlling variables. Use sheltered locations, stabilize the base, and make sure the trigger requires a deliberate nudge from the target animal.
In practice, you want repeatable sensitivity, not maximum sensitivity.
Carving notches that lock, then release cleanly
Notches should mate cleanly, with flat contact surfaces. If you carve rounded interfaces, they slip unpredictably. If you carve them too deep, the trigger binds and won’t release.
A good habit is to carve in small steps and test under load. If you see crushing or splintering, swap the stick.
It’s faster (and safer) than trying to “make it work” with a compromised piece.
Bait placement and scent control without overthinking it
Bait placement should force interaction with the trigger. If the animal can grab bait from the side, it will. Place bait so the animal must commit to the approach.
Scent control matters, but not the way movies suggest. Your biggest scent issues are fresh-cut wood odor and disturbed ground.
Use gloves if you have them, and minimize trampling around the set. For example, if you’re setting multiple snares, avoid walking directly on the game trail. Approach from the side and leave the trail as intact as possible.
Even a perfect trigger won’t help if the set is in the wrong spot. Placement is where most success is won.
Placement Strategy That Produces Results: Trap Lines, Funnels, and Time Management
The survival math: maximize probability per calorie
In survival, your time is inventory. Traps should be placed where encounter rates are highest, and they should be simple enough to replicate. A single perfect trap in a low-traffic area is worse than several decent traps in proven funnels.
Think in terms of a trap line. Instead of one set near camp, build 6-12 sets along a loop you can check quickly. That reduces travel time and increases your odds without expanding risk.
This also helps you stay objective. If one location consistently underperforms, you can drop it and reinvest effort where sign is stronger.
Micro-location: where the animal’s feet actually go
A “rabbit area” isn’t specific enough. You want the exact run the rabbit uses repeatedly, ideally with natural sidewalls of brush. Look for hair on branches, compressed vegetation, and consistent track direction.
For squirrels, micro-location often means a log crossing, a fence line, or the base of a tree where they hop down to forage. Set where movement is constrained.
Open ground gives animals too many choices and increases bypassing. If you can’t point to a clear funnel, keep scouting.
A simple trap-line workflow you can repeat
Use a repeatable process so you don’t miss obvious issues.
Trap-line checklist:
- Identify 2-3 high-traffic funnels before building anything
- Choose sets that match your cordage and tools
- Build one prototype and test-fire it safely
- Replicate only after the prototype is reliable
- Mark sets discreetly so you can find them without flagging them to others
- Check on a schedule you can maintain (and legally required intervals)
- Dismantle and erase sign when you move on
This is how you stay efficient and avoid turning trapping into an all-day project.
A smart trap line is only half the job. The other half is making sure your practices don’t create preventable harm.
Safety Practices That Prevent Injuries, Conflicts, and Unintentional Harm
Camp placement and human safety rules
Never set traps on or near human trails, near water collection routes, or around camp tasks like firewood gathering. In low visibility or fatigue, you (or someone with you) can walk into your own hazard.
Establish a no-trap radius around camp. If you’re in a group, designate one person to track locations and make sure everyone understands where sets are placed.
This is especially important with deadfalls because the risk is immediate and mechanical.
Non-target avoidance: pets, protected species, and scavengers
Non-target catch is one of the most serious ethical problems with primitive traps. It also creates legal risk and can escalate into safety issues if scavengers are drawn to a trapped animal.
To reduce that risk, make these habits non-negotiable:
- Avoid placing sets near human-use corridors (including informal trails)
- Focus on tight, species-specific funnels instead of open travel areas
- Keep bait choices appropriate for your intended target (so you don’t attract larger animals)
- Check traps frequently and remove them when you leave the area
If you can’t confidently avoid non-targets in a location, it’s a bad location-no matter how good it looks on a map.