Avalanche Terrain for Hikers and Snowshoers: Identifying Hazard Slopes, Safer Route Choices, and Survival Actions If Caught
Avalanche terrain basics that hikers and snowshoers routinely miss
Avalanche terrain is not a “mountaineers only” problem. If you hike or snowshoe in winter, you’re in the same physics as everyone else: snow on a slope, plus a trigger, plus a weak layer, equals motion.
Related Articles:
The reason hikers get hurt is usually not a lack of toughness. It’s because avalanche terrain often looks reasonable right up until it fails.
In military training, we treated terrain like an opponent. You didn’t argue with it, and you didn’t win by being stubborn. You won by reading it early, choosing exposure intentionally, and having rehearsed actions when things went bad.
Most avalanche education starts with gear and rescue. For hikers and snowshoers, the more important starting point is terrain. If you avoid start zones and terrain traps, you reduce the odds you’ll ever need rescue tools.
A slab avalanche generally needs three ingredients:
- A cohesive slab (snow that can move as a plate)
- A weak layer (the failure point)
- A slope steep enough for gravity to take over
You can’t easily see the weak layer, which is why terrain and conditions matter so much. The most reliable control you have is where you choose to walk.
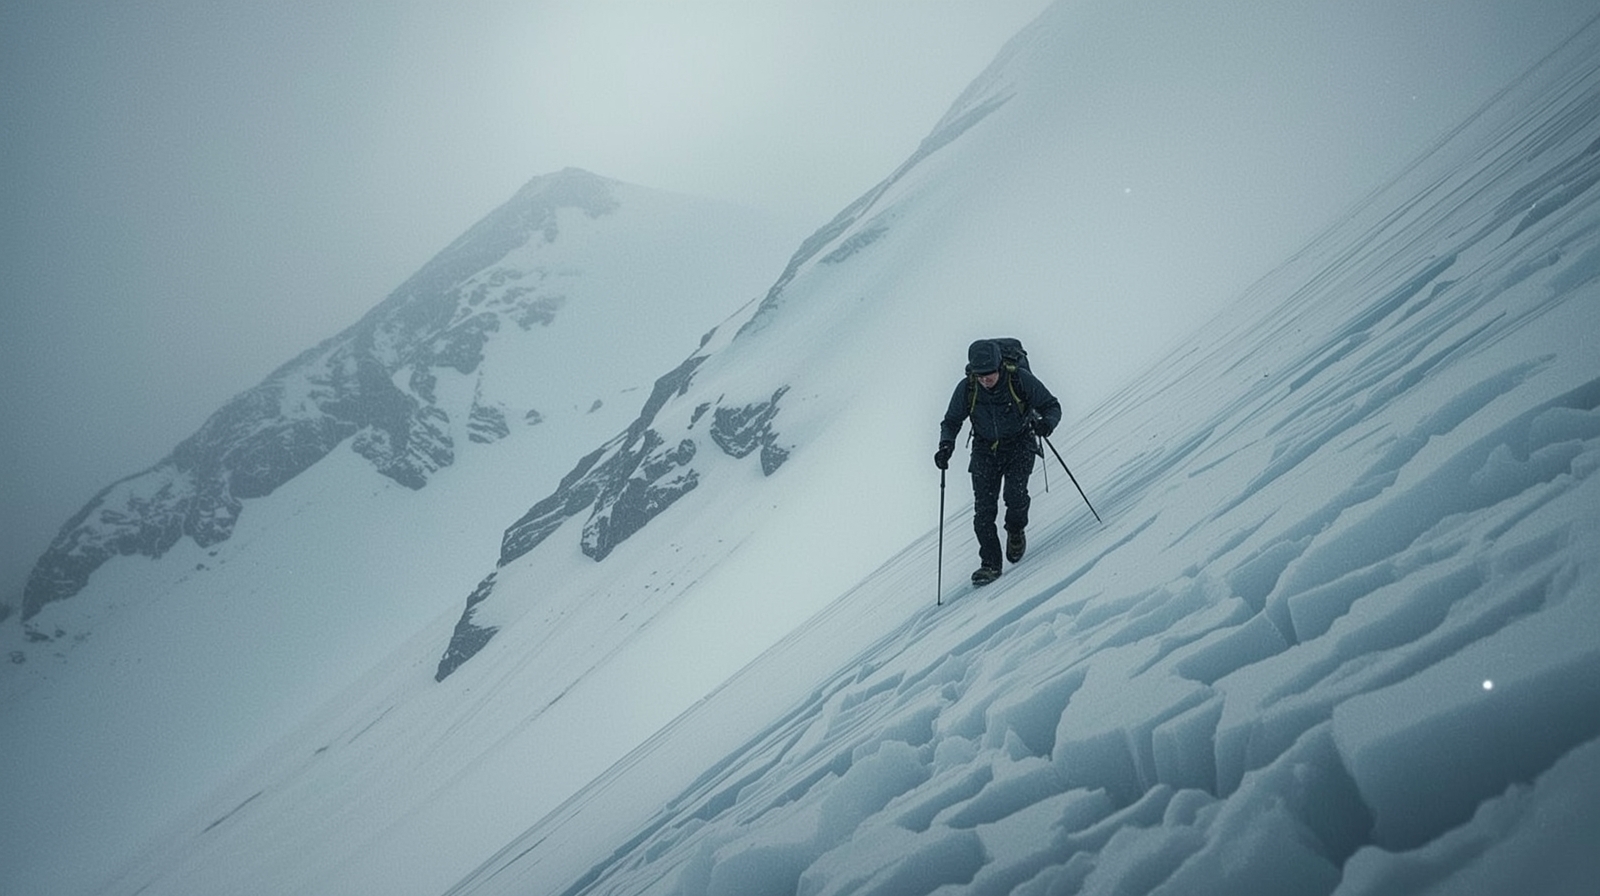
The slope angles that actually matter
Most slab avalanches occur roughly between 30 and 45 degrees. Below about 25 degrees, slabs are less likely to run with enough force to bury you (not impossible, just less common).
Above about 45 degrees, snow often sluffs more frequently. That can still be dangerous, but it tends to behave differently than a classic slab.
Here’s the common trap: you can be standing on “flat” ground and still be in avalanche terrain if a 35-degree slope looms above you. If it releases, it can:
- Sweep across your traverse
- Hammer you into trees
- Pile debris into a gully where you’re walking
Start zones, tracks, and runouts
Think in three parts:
- Start zone: where the avalanche breaks
- Track: the path it funnels through
- Runout: where it slows and piles up deep
You don’t have to be in the start zone to die. Plenty of fatalities occur in runouts where the slope angle is mellow, but the debris stacks like concrete.
If you’re snowshoeing a drainage bottom, you’re often in a runout. If you’re contouring below a steep bowl “just for a minute,” you’re exposed to the entire start zone above you.
Why “packed trail” and “tracks” are not proof of safety
A packed trail only proves that other people got lucky before you. It doesn’t prove stability for your time window, your load, or today’s weather.
Snow strength can change hourly with wind, sun, and temperature. One person might cross safely at 9 a.m., and you might trigger the same slope at 11 a.m.
Tracks also create social pressure. In the field we called it route magnetism-people drift to the line that looks easiest, not the line that’s safest.
Estimating slope angle without turning your trip into a math class
You don’t need to be a surveyor to make smart calls. But you do need an honest estimate of slope angle.
Many hikers never measure it, then wonder why they keep ending up on 33-38 degree slopes. That’s prime terrain for slab avalanches.
Your goal is simple: identify slopes in the main avalanche range (about 30-45 degrees) and treat them as suspect unless conditions and the forecast support travel.
With that baseline, you can make cleaner decisions in the next section when you start looking at weather and red flags.
The quick-and-clean phone method (and its limitations)
Most mapping apps can show slope shading or allow you to check angle. Use it before the trip to mark problem areas, and again in the field to verify what your eyes are telling you.
Be honest about limitations. Phone GPS and map resolution can mislead you in tight terrain, especially near rollovers and micro-features.
Cold also kills batteries. If you rely on a phone, manage it like mission gear: keep it warm, use airplane mode, and carry a backup power plan.
Visual cues you can train quickly
Practice these cues until they become automatic:
- If you feel like you must lean forward noticeably to climb, you may be entering the 30+ degree range.
- If you can descend quickly without slipping, you’re probably under 25-28 degrees.
- If small trees look “combed” downhill or the slope is naturally open (grassy, sparse timber), it can indicate repeated slide activity.
This isn’t a precise measurement. It is good enough to trigger caution and force a route check.
A simple field check with trekking poles
Here’s a low-tech trick: extend one pole and plant it downhill while you stand uphill. If you can form something close to a right angle between the pole and your line of sight down the slope, you’re in terrain where avalanches are plausible.
It’s not a clinometer. What it does well is force you to stop, look, and decide.
That pause matters. Many bad winter decisions happen while moving, when momentum replaces judgment.
Recognizing conditions that turn “normal” slopes into hazard slopes
Terrain is the stage. Weather and snowpack are the actors.
You don’t need to be a snow scientist to make safer choices. You do need to recognize repeatable danger patterns and notice when the day is trending worse.
A good habit is to “check the story” every hour:
- What’s the wind doing?
- What’s the temperature doing?
- What are you seeing on similar aspects and elevations?
Once you start asking those questions, the red flags below become easier to spot in real time.
Recent avalanches: the loudest warning you’ll ever get
If you see fresh crowns, debris piles, or trees snapped like toothpicks, you have a direct stability report. In operational terms: that’s confirmed contact. Treat it seriously.
Many hikers shrug this off because the slide is “over there.” But if it slid on a north aspect at 5,500 feet and you’re heading to a similar north aspect at 5,700 feet, you’re looking at the same problem.
For daily awareness, check regional advisories like Avalanche.org’s forecast hub before you leave.
Wind loading: when the hazard relocates
Wind transports snow like a conveyor belt. It strips one area and deposits slabs on leeward slopes, cross-loaded gullies, and below ridgelines.
That’s why you can have stable snow in the trees, then step into a wind pillow that fractures under you. The hazard may not be where you expected it to be.
Look for:
- Rounded, smooth, “pillowy” snow
- Shooting cracks
- Hollow, drum-like sounds
- Cornices (a loading sign for the slope below)
Rapid warming and sun: the clock is ticking
Sun and temperature spikes change stability fast, especially on east, south, and west aspects. If you’re postholing in wet snow, seeing roller balls, or watching small loose slides, you’re getting real feedback.
Plan timing like a professional: start early and get off sun-exposed slopes before they turn sloppy. Don’t count on “it’ll cool later” if your route forces you under big terrain traps.
NOAA point forecasts can help you anticipate warming and wind shifts: NOAA National Weather Service.
Terrain traps that turn small avalanches into fatal events
A small avalanche in open terrain can knock you over and leave you scared. The same slide in a terrain trap can bury you deep enough that rescue becomes unlikely.
Terrain traps are not rare. They’re exactly where winter routes often go: gullies, creek beds, road cuts, and the flat benches at the bottom of steep slopes.
As you read the traps below, keep one principle in mind: consequence is part of hazard. A “small” slide becomes a big problem when the terrain concentrates debris.
Gullies, creek beds, and drainage bottoms
Drainages are classic runouts. Snow piles deeply there, and the shape concentrates debris.
Even a modest slide from above can fill a gully like a bathtub. That’s how you end up with deep burial on ground that doesn’t feel steep.
If your snowshoe route follows a creek line, ask a hard question: what slopes feed into this drainage, and how far can debris run? If you can’t answer, you’re gambling.
This is where strong map habits pay off. Our guide on route planning and risk assessment with topo maps helps you identify these traps before you’re standing in them.
Trees and cliffs: trauma before burial
People picture avalanche death as only suffocation. In reality, trauma is common.
Trees, stumps, and rocks are fixed hazards that turn you into a pinball. Cliffs and abrupt rollovers are worse, because a small slide can push you over an edge and then bury you at the bottom.
If your route forces you beneath cliff bands or through sparse timber in a runout, treat that as high-consequence terrain, even on “moderate” days.
Road cuts and steep banks near “safe” trails
Some of the most deceptive avalanche paths cross popular winter routes. A gentle snowshoe trail can pass below a steep road cut or open slope that no one notices because it’s short.
Short does not mean safe. A small path can still produce a powerful slab with dense debris.
When you see a steep open bank above a packed trail, stop and evaluate it like any other start zone.
Safer route choices that still get you to good terrain
Avoiding avalanche terrain doesn’t mean you have to stay home. It means you choose lines that limit time under start zones and keep you out of runouts.
A disciplined approach is to plan two routes:
- Your intended line
- An avalanche-avoidance line that stays under roughly 25-28 degrees and avoids overhead hazard
That way you can adapt without improvising under pressure.
Ridges, ribs, and dense timber (with caveats)
Ridges are often safer because wind scours them and they’re less connected to big start zones. Ribs-small spines between gullies-can be excellent travel corridors that keep you out of runouts.
Dense timber can reduce slab size, but don’t treat trees as armor. Open glades, sparse forest, and recently logged areas can still slide.
A good rule of thumb: if you can comfortably ski or snowshoe fast through the trees, the spacing may be open enough to avalanche.
A practical comparison of common route options
Use this table as a quick planning filter. It’s not absolute, but it helps you think in trade-offs.
| Route option | Typical avalanche exposure | Common terrain traps | When it’s a smart choice |
|---|---|---|---|
| Ridge crest | Lower (often wind-scoured) | Cornices, cross-loading | When you can stay back from edges and avoid lee pillows |
| Valley bottom | Moderate to high (runout exposure) | Gullies, creek beds | Only when no overhead slopes threaten the drainage |
| Mid-slope traverse | High (connected to start zones) | Benches below bowls | Rarely worth it unless forecast is favorable and angle is verified |
| Dense mature timber | Lower to moderate | Tree wells, small gullies | When trees are truly tight and slope angle is low |
| Open bowl / meadow | High (classic start zone) | Terrain funnels below | Only with strong stability evidence and expert skills |
Using “islands of safety” like you mean it
An island of safety is a spot not exposed to overhead hazard and not in the runout. Think ridge knobs, thick tree clumps on low-angle ground, or well away from the fall line.
Don’t just name them. Use them.
Move from one island to the next, regroup there, and keep only one person exposed at a time when you must cross a suspect area.
That spacing concept is similar to what we teach for loose rock movement. If you want a non-snow example of how spacing prevents one mistake from taking out the whole team, see traveling safely on loose terrain.
Movement techniques and group discipline that reduce exposure time
Route choice is the big lever. Movement discipline is the fine control.
Most winter incidents I’ve seen in civilian groups come down to three patterns: bunching up, rushing a questionable crossing, or letting the fastest person set the pace without a plan.
Treat avalanche terrain like a controlled crossing, not a casual walk. If you operate that way, you buy time to think and reduce how long anyone is exposed.
Spacing rules that actually work
If you must cross a suspect slope, don’t stack the whole group on it.
Use a simple control method:
- Send one person at a time
- Everyone else watches from a safe zone
- Agree on the exact line and the regroup point
- Define what “stop” and “go” mean before anyone moves
On low-angle approaches beneath overhead hazard, spread out so one small slide doesn’t take everyone. The goal is to prevent a single event from creating multiple victims.
Track setting: keep it low-angle and keep it simple
Snowshoers often set a track straight up the fall line because it’s efficient. On a 32-degree slope, that’s also an ideal trigger line.
Instead, aim for a track that reduces both angle and exposure:
- Use switchbacks on lower-angle terrain
- Prefer ridgelines and ribs over open faces
- Avoid climbing directly beneath loaded rollovers
If your track has to cross beneath a convexity (a bulge that steepens), treat it as a high-risk spot and minimize time there.
Communication, roles, and the “quiet veto” problem
Before you step into questionable terrain, designate a lead (route) and a tail (accountability). Make sure everyone knows the plan for the next 200 yards, not just the destination.
Watch for the quiet veto: the person who feels uneasy but doesn’t speak because everyone else looks confident. In disciplined teams, discomfort is data.
If someone flags concern, you stop, reassess, and either adjust the route or turn around. That one pause often matters more than any piece of gear.